How to take a screenshot on Windows 11: every method, and where the files go
Every way to take a screenshot on Windows 11: Snipping Tool, PrtScn, single windows, delayed snips and screen recording, plus where the files are saved.
By The Applio team9 min read
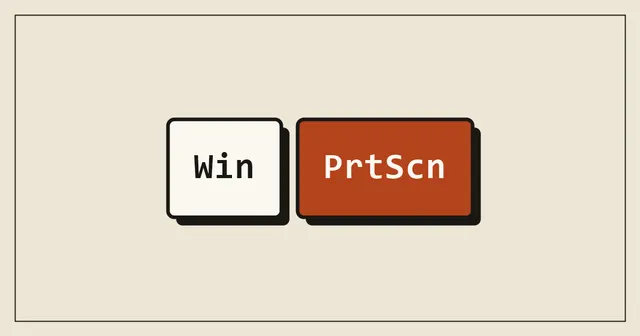
The fastest way to take a screenshot on Windows 11 is Win + Shift + S: the screen dims, you drag a box around what you want, and the image is copied to your clipboard and saved in Pictures\Screenshots. To save the whole screen straight to a file without any selection, press Win + PrtScn. Everything else below is a variation on those two, plus screen recording and what to do when the Print Screen key does nothing.
In this guide Win means the Windows logo key and PrtScn means the Print Screen key, which some keyboards label PrtSc, PrtScr or Print.
Quick reference
| Shortcut | What it captures | Where it goes |
|---|---|---|
| Win + Shift + S | An area, a window or the full screen, your choice | Clipboard, and saved to Pictures\Screenshots |
| PrtScn | Opens the same Snipping Tool overlay on current Windows 11 (see the setting below) | Same as above |
| Win + PrtScn | The whole screen | Saved to Pictures\Screenshots |
| Alt + PrtScn | The active window only | Clipboard |
| Win + Alt + PrtScn | The active app, through Xbox Game Bar | Saved to Videos\Captures |
| Win + Shift + R | A video recording of an area, with Snipping Tool | Videos\Screen Recordings |
| Win + Alt + R | A video recording of the current app, with Game Bar | Videos\Captures |
Method 1: Win + Shift + S for any part of the screen
Press Win + Shift + S and a small toolbar appears at the top of the dimmed screen. Pick a mode:
- Rectangle: drag a box. This is the default and the one you will use most.
- Window: click any open window to capture just that window.
- Full screen: captures everything on the screen.
- Freeform: draw any shape around what you want.
As soon as you finish, the screenshot is on the clipboard, so you can paste it straight into an email, a chat or a document with Ctrl + V. A notification also appears in the corner. Click it to open the screenshot in Snipping Tool, where you can draw on it, crop it or save a copy somewhere else.
Snipping Tool saves each screenshot automatically to Pictures\Screenshots. If you do not want that, open Snipping Tool, go to its settings (the three dots, then Settings) and turn off automatic saving.
On Copilot+ PCs, the toolbar has extra options such as a colour picker and a mode that tightens the frame around the content automatically. Microsoft lists these as Copilot+ PC features, so do not worry if your PC does not show them.
Method 2: the Print Screen key
On current versions of Windows 11, pressing PrtScn on its own opens the same Snipping Tool overlay as Win + Shift + S. Microsoft switched this on by default in an update, so a PC that has not been updated for a while, or one where someone changed the setting, may still use the old behaviour: PrtScn silently copies the entire screen to the clipboard, with no sound and no preview.
To choose which behaviour you want:
- Open Settings with Win + I.
- On recent versions, go to Bluetooth & devices, Keyboard. On older versions of Windows 11 the setting is under Accessibility, Keyboard. Typing "print screen" into the Settings search box finds it either way.
- Turn "Use the Print screen key to open screen capture" on or off.
If you turn it off, PrtScn goes back to copying the full screen. Nothing appears on screen when you press it, but you can paste the image into Paint, Word or an email.
Method 3: Win + PrtScn to save the full screen as a file
Win + PrtScn captures the entire screen and saves it as a PNG file in Pictures\Screenshots. The screen dims for a moment to show it worked. There is nothing to select and no notification to click, which makes it the best choice when you want several screenshots in a row, for example while stepping through an error message.
Method 4: Alt + PrtScn for the active window
Alt + PrtScn copies only the window you are working in, without the taskbar or anything behind it. It goes to the clipboard and is not saved as a file, so paste it where you need it.
It is the cleanest way to send someone a picture of a dialog box or an app's settings page. If you would rather have a file, use the Window mode in Win + Shift + S instead, which saves a copy to Pictures\Screenshots as well.
Method 5: a delayed screenshot with the Snipping Tool app
Some things disappear the moment you press a key: an open menu, a tooltip, a dropdown list. For these, use a delay.
- Open Snipping Tool from the Start menu (press Win and type "snipping").
- Make sure the camera icon is selected (screenshot, not video).
- Choose a delay, for example 3, 5 or 10 seconds.
- Select New, then open the menu or hover over the item you want to capture.
- When the delay runs out, the screen freezes and you can select the area as usual.
The delay is only available from the app window. The Win + Shift + S shortcut always captures immediately.
Scrolling screenshots of long pages
Snipping Tool cannot capture a scrolling page in one image. For web pages, the browser can do it:
- Microsoft Edge: press Ctrl + Shift + S (or open the menu and choose Screenshot), then "Capture full page". Older versions of Edge call the feature Web capture.
- Google Chrome: open Developer Tools with Ctrl + Shift + I, press Ctrl + Shift + P, type "screenshot" and choose "Capture full size screenshot". The image goes to your Downloads folder. Our Chrome shortcuts and hidden tricks guide has more of these browser features.
For long documents or apps outside the browser, you need a third-party tool, or you can record the screen while you scroll (see below).
Game Bar screenshots
Win + Alt + PrtScn takes a screenshot of the current app through Xbox Game Bar and saves it to Videos\Captures. It is meant for games, and it works while a game is running in full screen. For everyday screenshots the Snipping Tool methods are simpler.
How to record your screen
Windows 11 has two built-in screen recorders.
Snipping Tool. Press Win + Shift + R, or open Snipping Tool and switch to the video camera icon. Drag a box around the area to record, choose whether to include your microphone and the computer's sound, then select Start. Select Stop when you are done. Recordings are saved to Videos\Screen Recordings, and you can also open them in Clipchamp to trim them or add captions. Screen recording is a Windows 11 feature; the Windows 10 Snipping Tool only takes still images.
Xbox Game Bar. Press Win + Alt + R to start recording the current app, and press it again to stop. You can also open the full overlay with Win + G. Game Bar records the app you are using, and it does not work on the desktop or in some apps, such as File Explorer. Clips are saved as MP4 files in Videos\Captures.
For a quick tutorial, a bug report or showing a client how to do something, Snipping Tool is usually the better fit because you can record any part of the screen.
Edit and annotate a screenshot
Click the notification after a snip, or open any image in Snipping Tool, and you get a small editor:
- Pen and highlighter to circle or mark things, in a choice of colours.
- Shapes such as arrows and rectangles, which look neater than freehand circles.
- Eraser, crop, and undo and redo.
- Text actions, which recognise the text in the screenshot. You can copy all of it, copy a part, or use Quick redact to hide email addresses and phone numbers before you share the image. The text recognition runs on your PC.
- Edit with Paint, under the edit menu, for resizing or rotating the image.
When you are done, Ctrl + C copies the edited version and Ctrl + S saves it.
Quick redact is worth using whenever a screenshot shows an inbox, a booking list or a customer record. It takes a few seconds and avoids sharing someone's contact details by accident.
Where screenshots are saved
| How you took it | Where to find it |
|---|---|
| Win + Shift + S or PrtScn (overlay) | Clipboard, plus Pictures\Screenshots if automatic saving is on |
| Win + PrtScn | Pictures\Screenshots |
| Alt + PrtScn, or PrtScn with the setting off | Clipboard only |
| Game Bar screenshots and recordings | Videos\Captures |
| Snipping Tool recordings | Videos\Screen Recordings |
The quickest way there is to press Win + E to open File Explorer and click Pictures. If your Pictures folder is backed up to OneDrive, the Screenshots folder will be inside OneDrive\Pictures instead.
Clipboard-only screenshots are easy to lose when you copy something else. If you turn on clipboard history, Win + V lets you go back and paste an earlier screenshot. Our Windows 11 keyboard shortcuts guide covers clipboard history and the other shortcuts worth learning.
When PrtScn does nothing
Work through these in order.
- Check whether it went to the clipboard. If the Print Screen setting is off, PrtScn works silently. Open Paint and press Ctrl + V. If a picture appears, the key works and you only need to change the setting described in method 2.
- Try the Fn key. On many laptops Print Screen shares a key with something else. Press Fn + PrtScn, or check for an Fn Lock key that switches the top row.
- Look for another app that has taken over the key. OneDrive, Dropbox and screenshot apps such as Snagit or ShareX can claim PrtScn for themselves. Check their settings, or close them and try again. If you just changed a setting, restart the PC before testing.
- Check Snipping Tool notifications. If notifications for Snipping Tool are turned off, the screenshot is still taken but no preview appears. Look under Settings, System, Notifications.
- Repair Snipping Tool. Go to Settings, Apps, Installed apps, find Snipping Tool, open Advanced options and choose Repair. If that does not help, Reset clears its settings.
- Use another method. Win + Shift + S works without the Print Screen key at all. If your keyboard has no PrtScn key, the On-Screen Keyboard (Win + Ctrl + O) has one.
Common questions
How do I take a screenshot of just one window?
Press Alt + PrtScn to copy the active window to the clipboard. To get a saved file as well, press Win + Shift + S, choose Window mode in the toolbar, and click the window.
Why are my screenshots black?
Some apps block screen capture to protect their content. Streaming video services, for example, often show as a black rectangle in screenshots and recordings. This is the app's own protection, so it is expected behaviour.
Can I change where screenshots are saved?
Yes. In Snipping Tool's settings you can change the folders used for screenshots and screen recordings. For Win + PrtScn, right-click the Screenshots folder in Pictures, choose Properties, and use the Location tab to move it.
How do I take a screenshot on a Mac?
The shortcuts are different: Cmd + Shift + 4 captures an area and Cmd + Shift + 5 opens the full screenshot and recording toolbar. Our Mac keyboard shortcuts guide covers the rest.
Written by
The Applio team
We build booking software for appointment-based businesses: the Applio platform and the BarberSamir app on the App Store. We write about the tools and habits that save us time. More about us
Keep reading
Shortcuts
Windows 11 keyboard shortcuts: 60 that actually save time
A practical Windows 11 shortcut cheat sheet covering windows, screenshots, clipboard history, virtual desktops, File Explorer and text editing, grouped by task.
· 7 min read
Shortcuts
Mac keyboard shortcuts cheat sheet: 55 every Mac user should know
The Mac shortcuts that matter: Spotlight, screenshots, window tiling, Finder navigation, hidden files and text editing. Grouped by task, with macOS tips that most switchers miss.
· 6 min read
Shortcuts
Excel shortcuts cheat sheet: 45 shortcuts to work twice as fast
The Excel keyboard shortcuts that matter most: moving around big sheets, selecting data, formatting, formulas, filters and tables. Windows first, with Mac equivalents where they differ.
· 7 min read